Networking
HaLOS uses NetworkManager for network configuration, with Cockpit providing a web-based interface for managing connections.
WiFi
WiFi on Desktop images
If you're using a Desktop image with a monitor, keyboard, and mouse, connect to WiFi using the NetworkManager applet in the desktop top panel (right edge of the screen). Select a network, enter the password, and you're connected — just like any desktop Linux system.
WiFi on headless images
Headless images have no desktop environment, so WiFi must be configured through Cockpit or the command line. All headless images include a built-in WiFi access point for initial setup without Ethernet.
WiFi through Cockpit
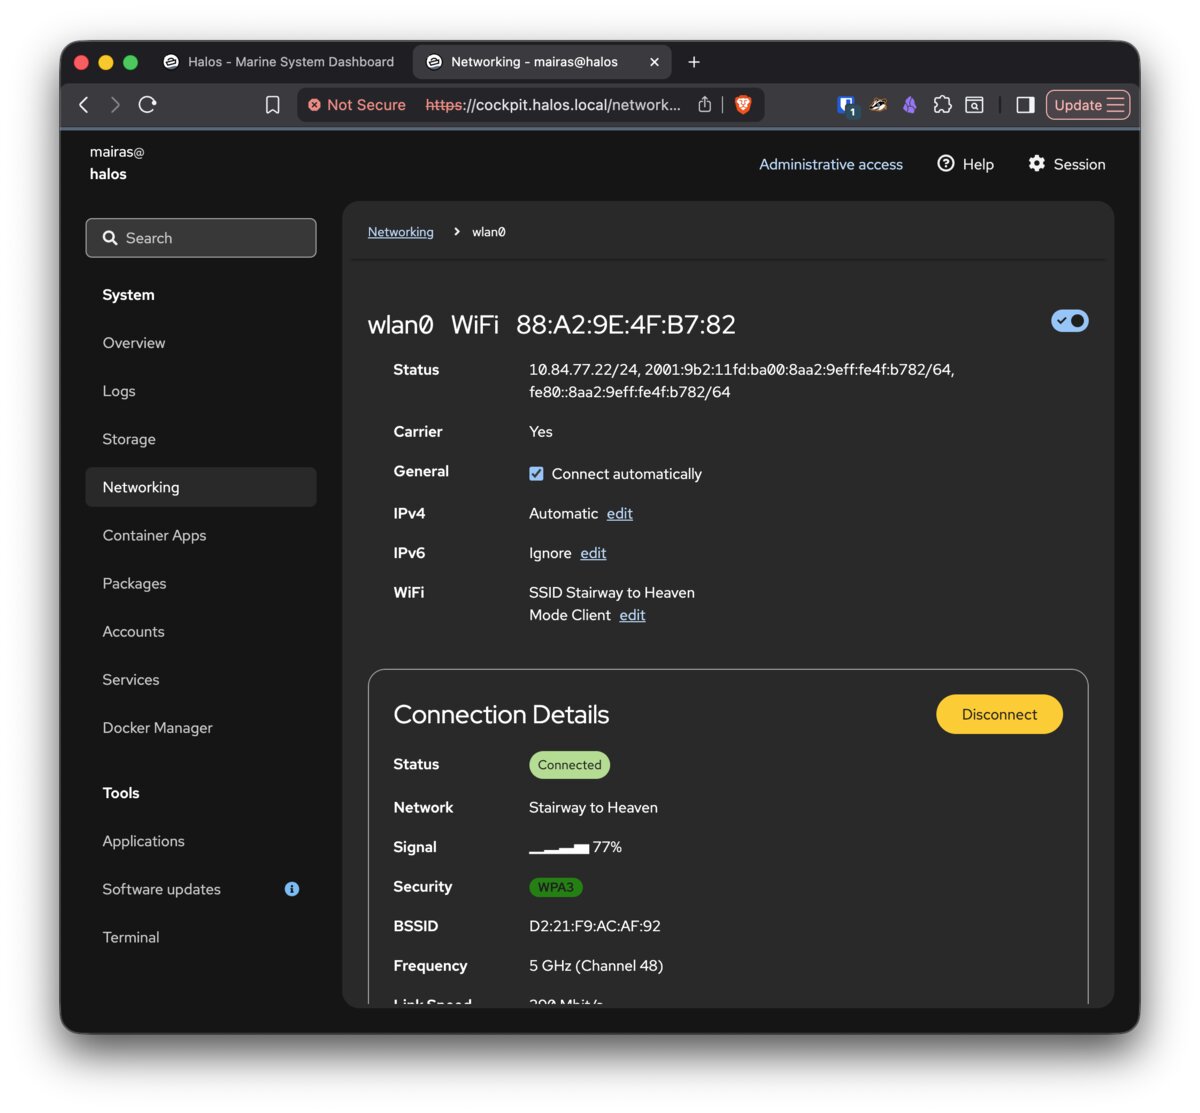
On any image, you can configure WiFi through the Cockpit NetworkManager module:
- Open Cockpit → Networking.
- Click WiFi (wlan0).
- Wait for the list of available networks to appear.
- Click your network.
- Enter the password and click Add.
Access point mode
All headless images and the Halos-Desktop-Marine-HALPI2-AP desktop variant create a WiFi access point on first boot:
- Network name:
Halos-XXXX(XXXX is unique to your device) - Password:
halos1234
This lets you reach the device without Ethernet. The hotspot has no internet of its own, so connect to it and open Cockpit at https://halos.local:9090/, then configure a WiFi client connection through Cockpit → Networking.
When the device joins a WiFi network, it keeps the hotspot running and acts as a client at the same time (concurrent AP and client). To do this it moves the hotspot onto the client network's channel, so a device connected to the hotspot may briefly disconnect and reconnect on its own. For the full first-time walkthrough, see First Boot — WiFi access point.
Serving more access point clients
The WiFi chip (Cypress CYW43455) has two firmware variants, and the system chooses between them with update-alternatives. The default standard variant accepts about 7 access point clients. The minimal variant is tuned for access point use and accepts about 19.
Use the minimal variant on any device whose hotspot is in real use. The client count is the smaller reason: in practice the standard variant seizes up with only a few clients connected, and then admits none at all.
Switch the variant:
Select the cyfmac43455-sdio-minimal.bin entry, then reboot. update-alternatives records the choice, so later firmware package updates keep it.
The minimal variant frees the chip memory for those extra client slots by dropping features:
- Automatic channel selection.
- DFS radar detection, so the 5 GHz channels that require it become unavailable.
- 802.11k/v/r roaming assistance and antenna diversity.
It is also an older firmware release than the standard variant (7.45.241 from 2021, against 7.45.265 from 2023).
If the hotspot does not come up after the switch, set a fixed channel on it, because the minimal variant cannot pick one on its own:
To go back to the default firmware, run the same command and select the standard entry, or run sudo update-alternatives --auto cyfmac43455-sdio.bin.
Ethernet
Ethernet works out of the box with DHCP. The device obtains an IP address automatically from your network's DHCP server.
To configure a static IP:
- Open Cockpit → Networking.
- Click on the Ethernet interface.
- Switch from "Automatic (DHCP)" to "Manual".
- Enter the desired IP address, netmask, gateway, and DNS servers.
Hostname and mDNS
HaLOS uses mDNS (multicast DNS) for local hostname resolution. The default hostname is halos, making the device reachable at halos.local.
Apps are accessed via path redirects on the base hostname (e.g., halos.local/grafana/), which redirect to dedicated HTTPS ports. Previously, per-app subdomains were advertised via mDNS (e.g., grafana.halos.local), but this was removed because Windows doesn't support multi-label .local mDNS names.
Changing the hostname
If you change the device hostname (via Cockpit → Overview or hostnamectl), all URLs change accordingly. A device named myboat uses:
https://myboat.local/— Dashboardhttps://myboat.local/grafana/— Grafanahttps://myboat.local:9090/— Cockpit direct access
After changing the hostname:
- The old
.localname stops resolving. Update your bookmarks. - TLS certificates are regenerated on next service restart to cover the new hostname.
Multiple interfaces on the same network
Connecting the device to one network over both Ethernet and WiFi usually works fine. In some cases, though, Avahi may register the hostname on more than one interface and rename it (e.g. to halos-2.local), leaving halos.local unresolvable. If you hit that, keep a single interface on a given network or put them on different networks. See Troubleshooting — Device disappears or shows up as halos-2.local.
Reaching the device from outside the LAN
mDNS only works on the LAN. For VPN or other off-LAN access, see Remote Access.
Troubleshooting network issues
mDNS not resolving: Some networks or client devices have issues with .local resolution. Try accessing by IP address instead. Check your router's DHCP client list for the device's IP.
WiFi won't connect: Verify credentials through Cockpit NetworkManager. Check Cockpit → Logs for NetworkManager entries. As a fallback, use Ethernet and configure WiFi from the wired connection.